Once our App is ready to release, we can publish it in the App Store so everyone with an iOS device can download it.
The steps that we need to follow to release our App are:
- Create App Identifier and Provisioning Profiles.
- Create our App page in AppStoreConnect.
- Build and Upload our App to AppStoreConnect.
- Send our App to review.
1. Create App Identifier and Provisioning Profiles
First we need to create our App Identifier and the certificates that we'll use to sign our App. We did this in the article Certificates II. You can follow the steps there before going to the Step 2.
2. Create our App page in AppStoreConnect
App Store Connect is where you manage your app’s metadata, screenshots, and submission. Here’s how to set it up:
- Log in to App Store Connect.
- Go to the "Apps" section and click the "+" button to add a new app.
-
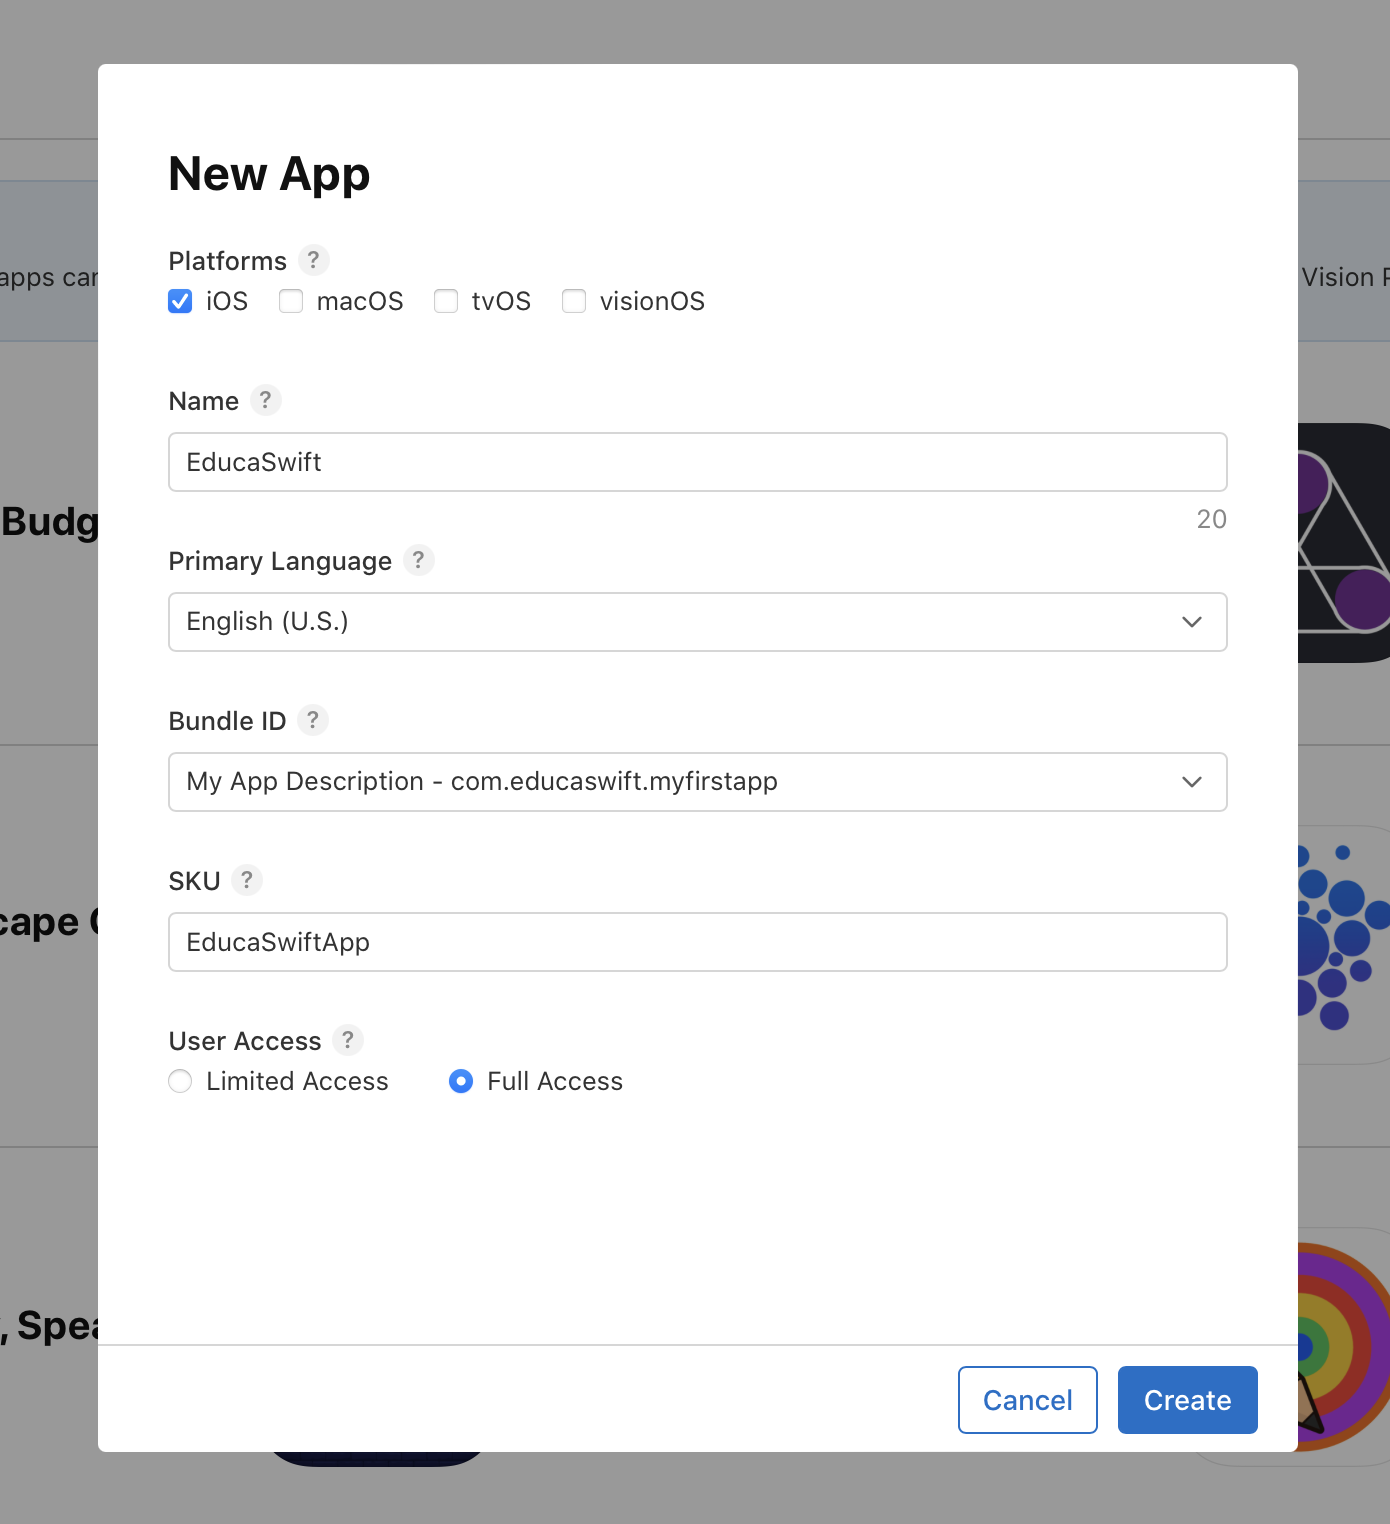
Fill out the basic App information:
- Platforms: iOS in our case.
- Name: this should be unique, this is the name that the users will see in the App Store.
- Primary Language: you can select any, you'll be able to add more languages later.
- Bundle Id: this is the App Identifier that we created in the Step 1.
- SKU: add any name here that identifies your product.
- User Access: you can limit which users see this app in App Store Connect.
After creating your app, you'll be taken to the App Page. This is where you'll add all the detailed information about your app. Carefully go through each section and provide the required data.
This is the minimum info you need to provide in order to be able to do the relase.
-
iOS App > 1.0 Prepare for submission
- Previews and Screenshots.
- Description.
- Keywords.
- Support URL.
- Copyright.
- Build (we'll provide this in the next step).
- Contact Information.
- Sign-In Information (only if your App requires to be signed-in to use it).
-
General > App Information
- Name (already added in the previous step).
- Subtitle.
- Category (primary and secundary).
- Content Rights (fill out the form based on the specifics of your app).
- Age Rating (fill out the form based on the specifics of your app)
-
App Store > TRUST & SAFETY > App Privacy
- Privacy Policy
- Press "Get Started" and fill out the form based on the specifics of your app.
-
Monetization > Pricing and Availability
- Price Schedule
- App Availability
3. Build and Upload our App to AppStoreConnect
On Xcode, with the main Scheme of your App selected, create a release build form menu bar option Product > Archive.
When the compilation is finished, an Organizer window will pop up showing the new build in the Archives list. In case you don't see this window, you can open it from menu bar option Window > Organized.
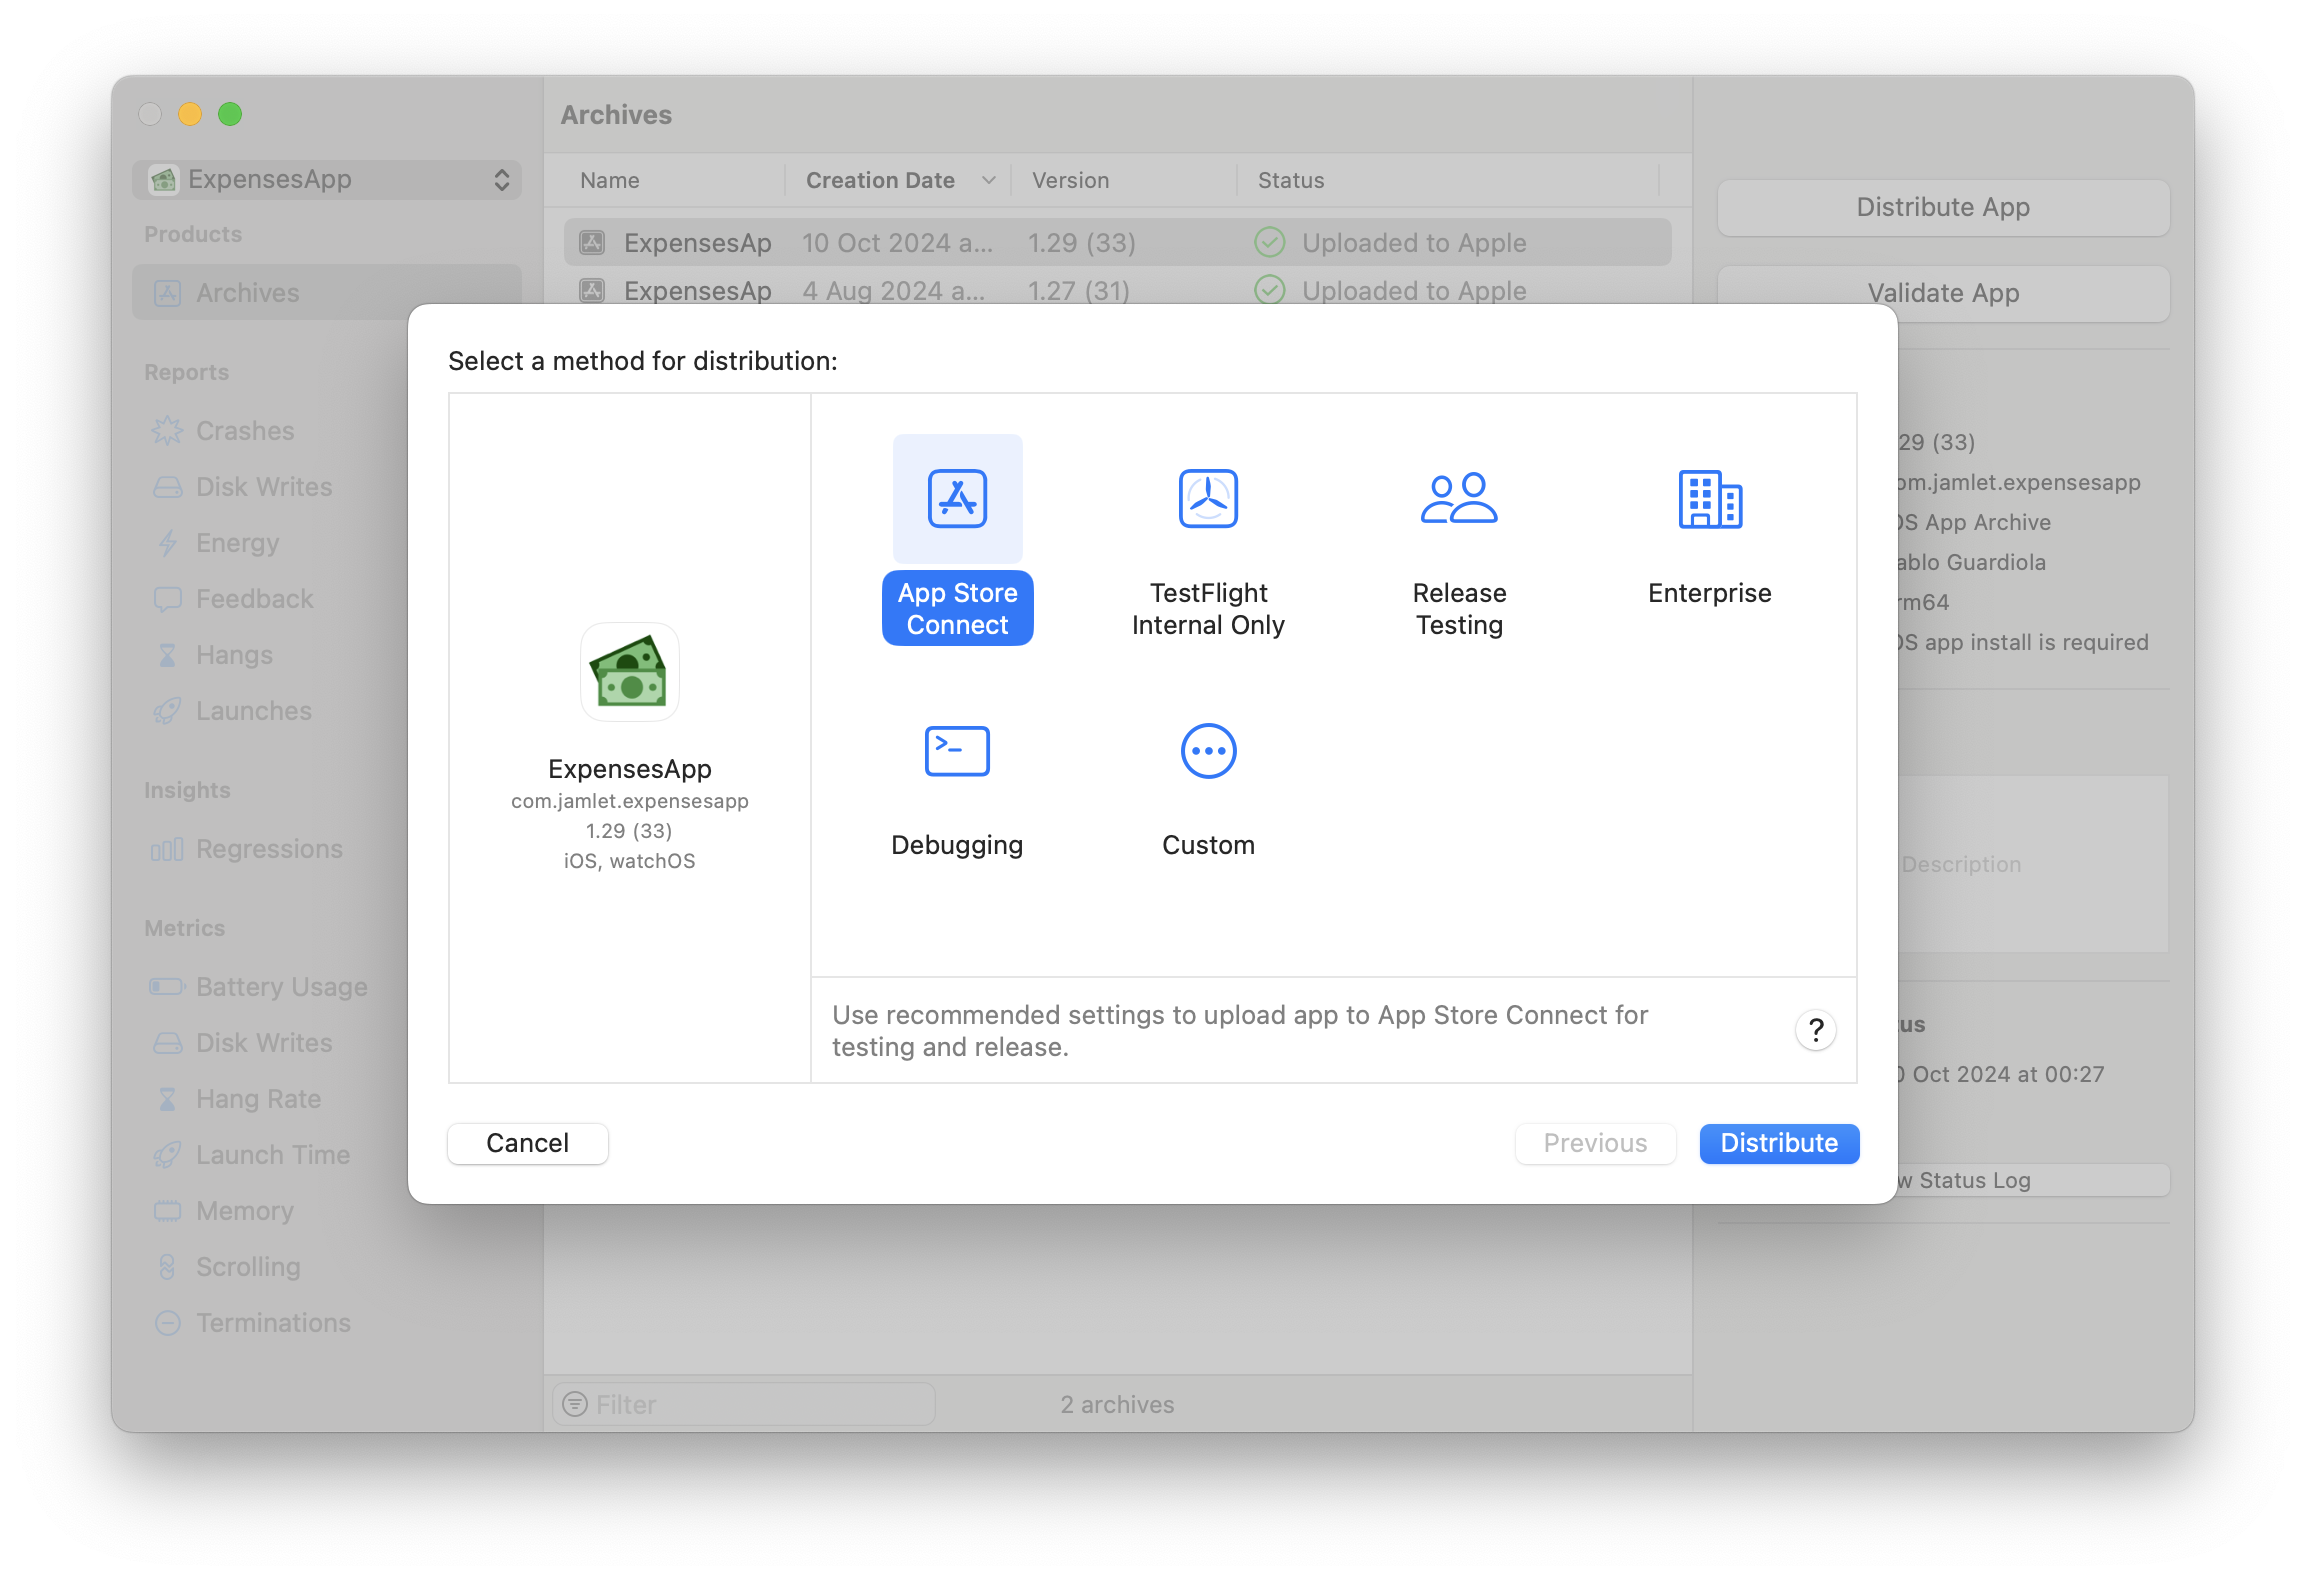
To upload our build (or archive) to the App Store Connect, click on Distribute App button, select App Store Connect, and then click on Distribute button.
If the upload is successful, a confirmation message will appear.
4. Send our App to review.
Once our build is processed by App Store Connect, we'll be able to add it to iOS App > 1.0 Prepare for submission > Build. This will enable the Add for Review button which will prepare our App for review. Then, the last step is to click Submit for Review button, that will send our App to be reviewed by Apple.
🎉🎉 When Apple approves our App, it will be released automatically and it will be visible for the users in a few hours. 🎉🎉


Be the first to comment